Let's build a DNS forwarder in Azure
-
date_range 10/01/2023 15:00 infosortHandsOnlabelPostgreSQLMySQLDNS
Why you need a DNS forwarder in Azure
When you deploy a PostgreSQL/MySQL flexible server into an Azure Vnet, the server will not have a public IP address, but will get a private IP address belonging to the Vnet. Because the private IP belongs to the Vnet, the FQDN of flexible server cannot be resolved by using any public DNS server like 8.8.8.8.
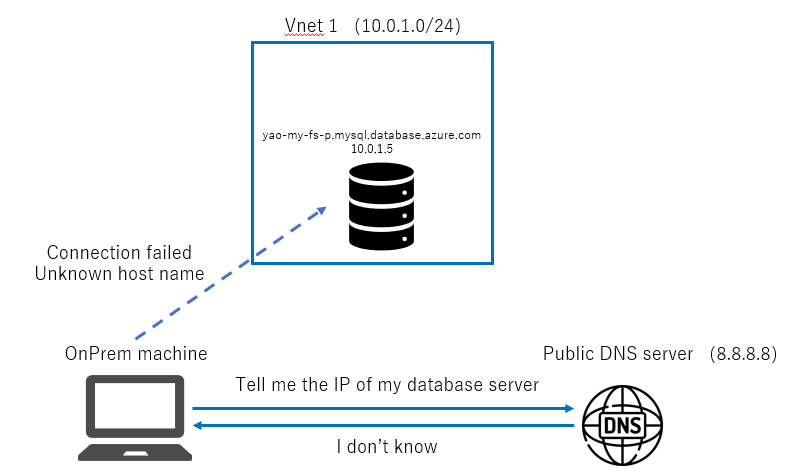
If your client exists in an Azure Vnet, you can easily use Azure’s DNS server(168.63.129.16) to resolve the FQDN of your flexible server. But if your client exist in other network environments, you will not be able to use the Azure DNS server directly and this is why you need a DNS forwarder to forward DNS requests to Azure DNS server.
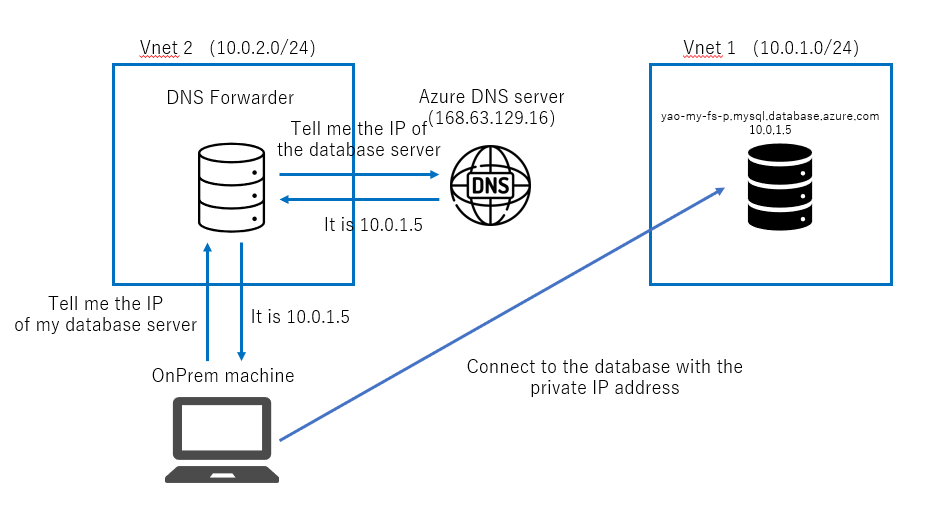
You can find more information about DNS forwarder at here.
Let’s ROCK!
Create a new RG
az group create --name handsOn --location japaneastCreate a new VNET and subnet
az network vnet create --name handsOnVnet --resource-group handsOn --address-prefixes 10.100.0.0/16
az network vnet subnet create --name dnsForwarderSubnet --vnet-name handsOnVnet --resource-group handsOn --address-prefixes 10.100.0.0/24
Create a new VM
az vm create -n dnsForwarderVm -g handsOn --image UbuntuLTS --admin-username handson --admin-password handsOn12345678 --vnet-name handsOnVnet --subnet dnsForwarderSubnet --public-ip-address-allocation staticList NSGs in RG. (If an empty returned, just skip step 4 and 5)
az network nsg list --resource-group handsOn --query []."name"Add NSG rules
az network nsg rule create -g handsOn --nsg-name dnsForwarderVmNsg -n Allow22 --priority 100 --protocol * --access Allow --direction Inbound --destination-port-ranges 22
az network nsg rule create -g handsOn --nsg-name dnsForwarderVmNsg -n Allow53 --priority 101 --protocol * --access Allow --direction Inbound --destination-port-ranges 53
Get public IP of VM
az vm show -g handsOn -n dnsForwarderVm -d --query "publicIps"SSH into your VM
ssh handson@xxx.xxx.xxx.xxxInstall DNS service on your VM
sudo apt update
sudo apt install bind9
Modify DNS service config file
sudo vi /etc/bind/named.conf.optionsoptions {
directory "/var/cache/bind";
// If there is a firewall between you and nameservers you want
// to talk to, you may need to fix the firewall to allow multiple
// ports to talk. See http://www.kb.cert.org/vuls/id/800113
// If your ISP provided one or more IP addresses for stable
// nameservers, you probably want to use them as forwarders.
// Uncomment the following block, and insert the addresses replacing
// the all-0's placeholder.
allow-query { any; };
forwarders {
168.63.129.16;
};
//========================================================================
// If BIND logs error messages about the root key being expired,
// you will need to update your keys. See https://www.isc.org/bind-keys
//========================================================================
dnssec-validation auto;
auth-nxdomain no; # conform to RFC1035
listen-on-v6 { any; };
};
Restart bind9
sudo systemctl restart bind9Create a private DNS zone link (If the DNS forwarder and Flexible server are in same VNET, just skip this)
We are going to do this via Azure portal. Firstly, we open the network setting of Flexible server to see which private DNS is bound.
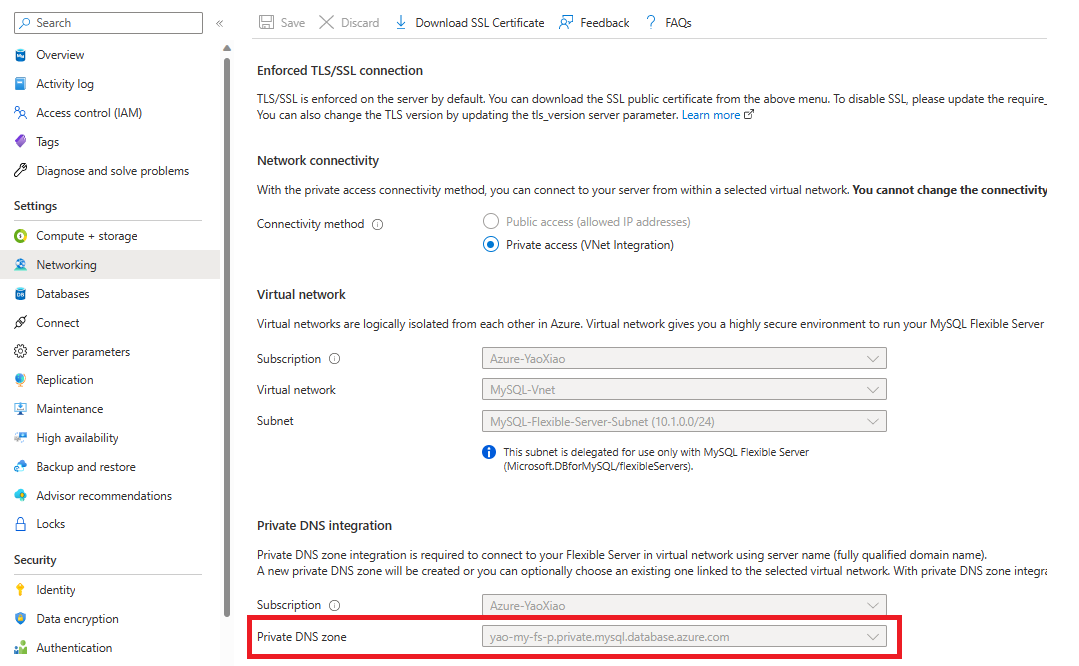
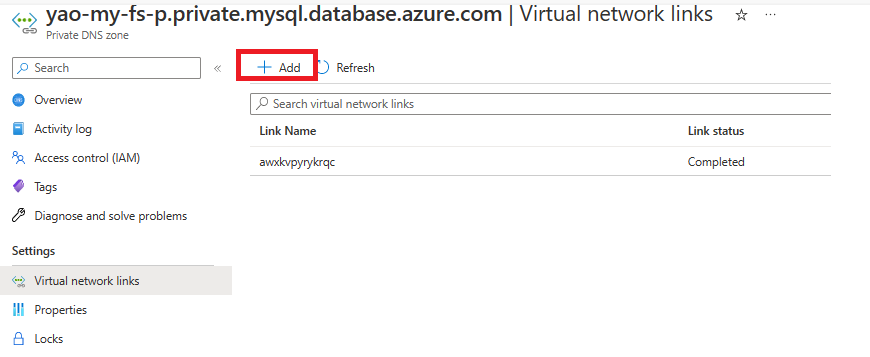
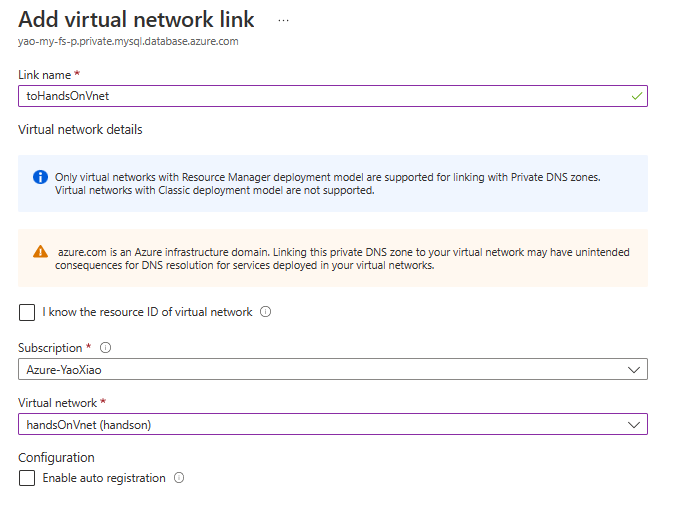
Then, we open private DNS zone detail page, and create a new Virtual network link.
